Canvas Tent Maintenance

A well cared for canvas tent can provide a lifetime of camping fun. Canvas tents are often much more expensive than nylon tents and should be cared for to ensure the investment lasts a long time. Canvas tents are extremely durable and thus generally require minimal maintenance.  A properly maintained canvas tent will provide shelter for years to come.


    1. The most important maintenance you can do on your tent is to hang it out to dry before storing it for an extended period. Condensation and any other dampness in the fabric will ruin the tent if not eliminated before storage. Hang your tent from a deck, over a fence or across a few patio chairs in direct sunlight to remove any dampness left over from your camping trip. It is recommended that you use a ground cover when camping to limit the amount of condensation that builds up on the tent. 
    2. Rips or holes in the canvas often will be covered under a warranty, so be sure to check with the manufacturer. If not under warranty rips or holes can be patched by sewing a small piece of canvas over the damaged area. Waterproof treatment should be applied to the patch to ensure the tent is watertight.
    3. Some tents will require annual waterproofing treatment. Be sure to consult your user manual for directions specific to your tent. Treating some tents with waterproofing solutions could result in decreasing the breathability. Many manufactures will also suggest a particular product that has a long track record of working with your tent.
    4. Proper storage is an important component of maintaining your tent. Select a dry and cool spot for your tent to ensure mildew is not an issue. Store your canvas tent off the ground to avoid any problems with rodents. The warm canvas and smell of campfire are both attributes which will attract rodents. Consider storing your tent in a sturdy bag to help discourage rodents and avoid potential problems with water damage.
    5. Avoid using soap when cleaning your tent. Soap can reduce the waterproofing capabilities of your tent. To clean use a garden hose and wipe with a cloth. Once done cleaning allow the tent to dry in the sun before packing for storage.
Canvas tents are durable and generally will last a longtime when cared for properly. Protect your investment by following these simple guidelines. Always be sure to consult the user manual that came with your tent to avoid performing any maintenance that will void the manufactures warranty.


Article Source: http://EzineArticles.com/8114667

What is being Eco-friendly?


Being eco-friendly or environmentally friendly is becoming more and more important. You can see the term used in everything from job ads to dating profiles to even listings houses and vacation homes. So, what is being eco-friendly?
The simplest way to define what being eco friendly means is to say that it is the act of living with intent. The intent is focused on not creating harm to environment, and to prevent as much harm from occurring to the environment through your interactions with it. It goes beyond an idea and extends to actual practices that influence how communities, businesses and individuals conduct themselves. Being eco-friendly goes far beyond just turning off lights when you leave the room or separating your garbage for recycling – it is about changing the purpose of how you live.
Eco-friendly products promote green living that help to conserve energy
and also prevent air, water and noise pollution. They prove to be boon for the environment and also prevent human health from deterioration.

Eco-friendly transportation
How to Become Eco-friendly?
You can start to become eco-friendly by becoming aware of the how your choices effect the environment. There are three basic stages to becoming eco-friendly, they are –
    1. Learning to consume items that cause minimal environmental harm.
    2. Discovering the extent of your carbon footprint and acting to lessen that footprint on the environment.
    3. Striving to support others that work to live and produce eco-friendly and sustainable communities.
As you can see, the first step is about you immediately acting to change the way you consume things in life. This means changing your habits about driving, what types of packaging you use, how you dispose of waste and how you use natural resources.
The second step looks at the extent of your carbon imprint that you may not be able to change – such as living in a house, having to drive a car or the type of employment you have and acting with the responsibility to lessen that imprint to the best of your ability.
The last one involves actively seeking connections with other eco-friendly persons, communities and businesses and choosing to network and support them to create a more sustainable life. That may not be as easy as it seems, which is why it is the third step. To live in and support a sustainable community and economy you may not have many of the conveniences that you are used to – by far this is the hardest thing to adjust to.
Here are 10 Steps to Become Eco-friendly:-
1. 3 R’s of Waste Hierarchy: The 3 R’s of waste hierarchy can reduce the amount of waste generated and improve the waste management processes. Reducing what is produced and what is consumed can reduce the amount of waste that is generated. Reuse items for different purposes instead of disposing them off. Recycle items like aluminum cans, plastic, paper, glass that can be shaped into a new item.
2. Conserve Water and Electricity: It takes energy to produce fresh water and electricity. Few simple ways like turning off lights when not in use, fixing leakages, proper insulation, using maximum daylight, installing energy efficient windows, purchasing energy efficient gadgets can reduce your daily energy consumption. Learn here more about 151 ways to conserve energy.
3. Plant More Trees: We all know why we need more trees on this planet. They give us oxygen, fruits, timber, prevent soil erosion, control floods, provide shelter to wildlife. Massive scale deforestation in last couple of decades has reduced forest area by significant percentage. The need of hour is to work with environmental groups to educate more people and  plant more trees so as to make this planet clean and eco-friendly.
4. Protect Local Water Sources: Hazardous waste materials like paint, oil, ammonia and other strong chemical solutions should never be disposed on the ground as they’ll seep into the groundwater. Join local water conservation groups and fight against water polluters who dump their industrial waste in rivers.
5. Drive Less, Walk More: A simple and yet more effective way to live eco-friendly life is to either take public transportation for your daily commuting needs or try pooling in with your office colleagues to save fuel and reduce your carbon footprint. If your office is couple of miles away from home, you can either start half an hour early and walk on foot or ride a bicycle. If you’re and avid traveler, you can follow these green travel tips.
6. Buy Energy Efficient Products: Energy efficient products with 5 start energy rating consume less energy and prove to be eco-friendly. For instance, CFL bulbs consume 40% less energy and last 10 times longer than traditional bulbs.
Eco-friendly house
7. Buy locally Grown Products: When you buy or produce locally grown products, you are actually reducing your carbon footprint in the form of using less plastic bags, saving fuel to get vegetables from the market, using less packaged material….. . Apart from this, you can also sell surplus to your friends or relatives.
8. Prevent Littering: Litter can originate from construction and demolition sites, households, industries, uncovered trucks, pedestrians, and moving vehicles. Littering can have big impact on environment, wildlife and local tourism industry. Being a responsible citizen, it’s our responsibility to make our cities clean and impart same education to our kids.
9. Buy Recycled Products: Always look out for recycling symbol when you visit grocery shop to buy items for your home. That will make you environmentally responsible and eco-friendly. Also, try to carry grocery bag with you to avoid buying items in plastic bags that will later end up in landfills.
10. Join Environmental Groups to Combat Pollution: Protecting mother Earth is everyone’s responsibility including you. The best you can do is to join different environmental groups in your city and provide helping hand to make this planet environmentally friendly.

THE ECO-FRIENDLY LIFE

Living the eco-friendly life has some advantages and disadvantages. As mentioned earlier, one of the disadvantages is that may have to forgo some of the more modern conveniences. Not many, but the conveniences like fast foods and certain types of luxury activities do little more than create a burden on the environment. One of the best examples is the idea of the personal car. While you may realistically need a personal vehicle, you do not need one that gets poor gas mileage or is made with luxury accessories or advanced electronics that are impractical, and also consume vital natural resources.
That Land Rover may have a special gauge to tell you if you are right side up or upside down in the event of a sandstorm, but chances of encountering a sandstorm in New Jersey, much less actually doing an activity that would need a vehicle like the Rover is so minimal that it is a luxury that is unnecessary.

THE ECO-FRIENDLY BUSINESS

Creating an eco-friendly business means you are mindful of the waste products your business creates, and the way it uses resources to do business. There are very many options for how you can do packaging and advertising that have a much lower impact on the environment. As a business, you stand to make a stronger impact in how fuel conservation is approached by working with suppliers that utilize hybrid technologies and making sure that a part of what you consider when buying or selling is the cost and impact of the shipping of the product.

THE ECO-FRIENDLY COMMUNITY


IMAGE CREDIT:
HTTPS://WWW.FLICKR.COM/PHOTOS/RAMBONP_NPSINGH/11094474164
HTTPS://WWW.FLICKR.COM/PHOTOS/41131158@N06/3848068978

The top 2 reasons people mistakenly think their horse rug is leaking.......

Waterprrof Deniers

1 -Reduced breathability/sweating.

If you have an unlined rainsheetyou can see the underside of the denier thru the lining. If you hold the rug up to the sun and look up from the underside – you will see the thousands of little pins holes of light – these are the waterproof pores in the fabric that give the rug its breathability. The waterproof membrane insures the holes are smaller than a water molecule – so water can't enter the rug. To cut costs - many cheaper denier fabrics are not breathable.
Denier Fabrics can be made breathable via using ultra tough hi-tech fabrics which are then coated with a micro-porous formula making the fabric completely waterproof and breathable. This means that the outer fabric will protect your horse from the rain and elements while still allowing sweat or condensation produced by your horse's heat to escape through.
The waterproof membrane also needs to be breathable otherwise your horse will over heat quickly. Cheap turnouts often use membranes that have a non breathable membrane. (much cheaper from a manufacturing point of view)

For any turnout rug to keep your horse comfortable on the inside, both the outer fabric and the lining should also be breathable - because even in cold conditions, your horse will perspire and if a garment does not have sufficient breathability, the moisture (from perspiration) and difference in outside/inside air temperature, will build up as condensation on the inside of the rug. 

This problem is exaggerated if your horse does some sudden activity. A quick 30sec gallop across a paddock can cause an average horse to perspire very quickly and the rainsheet just doesn't offer enough breathability for the horse to cool down quickly

Keep in mind that regardless of the rugs breathability rating - in wet conditions, it will be reduced to almost zero as water covers the rug's fabric pores. This can cause condensation to accumulate on the inside of the rug. This extra moisture on the inside may also give the illusion that the garment is letting water in from the outside, when in reality it is your horses perspiration and condensation from the difference in outer air temperature. This is more common when using rain sheets, especially in open neck rain sheets, where water enters in around the neckline and then condenses from body warmth
Most Synthetic Turnout combos have a fill or lining of up to 300grams and this alleviates this problem, as it assist's the rug to breath and keeps the horses excess perspiration off the horse's coat. If you are using an unlined rain sheetin humid, extended wet or cold conditions – you may need to use in conjunction with a light cotton under rug or similar with a good moisture wicking properties. The horses perspiration and condensation needs to be transported away from their skin.
It's much like us wearing a raincoat against our bare skin - with your body heat and perspiration, you will soon be very clammy under your raincoat and any moisture that enters via a neckline etc – will condense under the raincoat. You will end up very damp in a short span of time. However if you wear a T-shirt you will help alleviate the problem.
Never underestimate how much condensation will accumulate under rug in a short span of time. A horse can perspire up to 1 litre per hour.

2 - Wicking

Overtime, water will wick its way up the internal lining of a horse rug. Water gathers on the drip lines and bindings of the rugs and the internal linings will slowly suck up moisture via a natural capillary action. In most cases this happens slowly and doesn't have much of an impact.
However this process is rapidly accelarted when you have an under rug that is hanging out from under your rainsheet. You only need an under rug hanging out a few mm from the top rug and this fabric acts a bit like a sponge sucking up the rain as its  coming off the outer rainsheet and you can end up with both the under rug and the rainsheet lining being wet.  You don’t need a lot of rain for this to happen, its more about the length of time involved. Ie 5mm of rain that falls in 10mins wont have much of an effect. But 5mm over 6hrs allows more time for the capillary action and for water to wick its way in.

How to Clean Mold Out of a Pop Up Camper


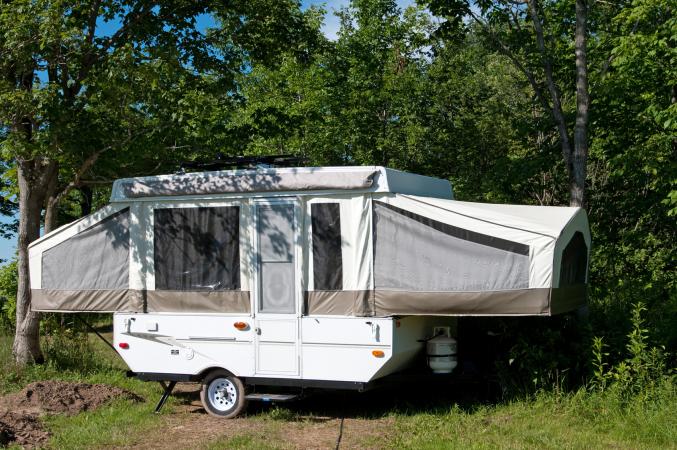
When the canvas part of the camper is set up, it can get wet. If you're not able to dry it before you have to fold the camper up again, the conditions are just right for mold. What's worse, the insipid growth can infect every area of your camper. Follow these instructions to remove the current mold infestation from your camper and take steps to protect it from the elements to keep future problems.

Step 1: Drying the Canvas

The canvas tends to be the most susceptible part of the camper for mold and mildew problems. It's important that if you have a major mold problem in your camper, you treat the entire interior including the upholstery, carpets and hard surfaces. However, the canvas undoubtedly takes the longest to clean and therefore, you'll want to start there first.

Open Camper in Direct Sunlight

The first step in ridding your camper of mold and mildew is drying it out. Ideally, you should unfold the camper and let it sit out in direct sunlight. Direct sunlight helps inhibit growth of mold spores. While drying it out won't deal with the stains that are already there, it will help prevent further spread and the sunlight will kill any live mold spores.

Dry Scrub the Canvas

Using a stiff bristled brush or a stiff broom, brush and scrub as much mold off of the canvas as you possibly can. If the problem isn't too sever, you may be able to get a substantial portion of the mold off of your canvas. In most cases, scrubbing with a stiff brush is just the preliminary, but necessary, first step to mold removal.

Step 2: Treating Mold and Stains

You want to avoid using bleach and chemicals that contain bleach. While it's true that bleach effectively kills mold, it also strips the canvas on your popup camper of its sealant. Having a mold-free camper that leaks is no better than having a moldy camper! The general rule of thumb is to use the mildest cleaner you possibly can, that is still effective against your mold problem.

Homemade Solutions

For each homemade solution, mix the solution in a spray bottle according to the proportions below. Spray solution directly on mold, and use a damp cloth to wipe clean. Use a towel to wipe up any excess moisture and leave the camper opened in direct sunlight if possible. Always test solutions in an inconspicuous area.
  • Rubbing Alcohol: Mix a solution of half rubbing alcohol and half water. The acidity in the rubbing alcohol kills mold spores.
  • Vinegar: Vinegar has long been used as a cleaning agent because of its ability to kill mold and mildew spores. Use it straight on the mold spot to kill spores and clean stains. You can dilute it with water as well.
  • Tea Tree Oil: Tea tree oil has anti-fungal properties and can work well to treat mold. It is more expensive than vinegar and rubbing alcohol, so it's ideal for treating smaller areas. Mix together two teaspoons of tea tree oil with two cups of water.

Commercial Products

If you catch mold right away, you should be able to treat it painlessly. However, if your mold problem is big, or you simply want a commercial product, there are products on the market designed for use on campers. You'll want to be careful and choose something that is made to remove mold and mildew, but will not damage the water protectant coating on your camper. Follow manufacturer's directions to apply.

Step 3: Repairing Problems that Cause Mold

Before you put your camper away for the season, you'll want to take precautions to prevent any future problems. Not only does this include determining and dealing with the source of your mold, but it may include repairing the canvas of your camper, or giving your camper a preventative treatment to help restore the sealant on the canvas material.

Check Pipes

Make sure all the pipes in your camper are in good working order. If you find any leaks, go ahead and repair them before you put the camper away for the season. Keep in mind that not all repairs are easy DIY projects. You might need to hire a professional. For recommendations, it's best to go to your local RV or camper dealer.

Repair Canvas

If your camper has a leak in its canvas, you'll want to repair it with a product specifically designed for popup camper canvas. It's important to use something that's specifically designed for campers so as not to further damage the camper. If repairing the leak is not an option, you'll have to look at replacing the canvas. For the best advice, call your camper's manufacturer. Even if your camper is no longer made by that manufacturer, they will be able to tell you how to fix the canvas on your camper.

 Tent and Outdoor Gear Waterproofing SprayWaterproofing Your Camper

If your camper is no longer waterproof, take care to repair the damage early before it can get worse. Use a product specifically designed for camper canvas use such as
Dry Guy Tent and Outdoor Gear waterproofing spray. Do not make the mistake of trying to waterproof your camper with a product not specifically made for campers.

Prevent Future Problems

You've heard the saying, 'an ounce of prevention is worth a pound of cure.' The best way to prevent mold problems in your camper is to put it away dry and store it in a dry place. If it's raining when you put the camper away, unfold it and dry it out in the sun as soon as possible. Check pipes seasonally for leaks and make repairs as quickly as possible. Actively preventing mold and mildew in your camper is the best way to avoiding costly repairs or even canvas replacement.

Outdoor Survival : 13 Winter Camping Tips For Every Survivalist

Winter camping means having to deal with harsh elements and cold weather. The latter is perhaps the most outstanding feature of the winter camping experience. Cold weather can be a source of great discomfort for many, but for some survivalists, camping in the snow poses an exciting challenge and is a way to put your skills to the test. If you’re well prepared and know what you’re doing, winter camping can help you better understand your capabilities as well as your limits.

Tips For Winter Camping Every Survivalist Should Remember

While winter camping is not everyone’s idea of fun, it can still be made enjoyable and comfortable. The important thing is to be prepared as you will be needing more gear than you would while camping in the summer. There are lots of benefits to be gained from winter camping. There are fewer campers, more space, and cheaper fees. You won’t be bothered by bugs. If you are properly equipped, you will enjoy a restful sleep. The campfire also becomes more enjoyable in the snow. To make the most of your winter camping experience, you need the right gear, the right attitude and these tips that we have collected.

1. Prepare for winter camping


Prepare for winter camping | Outdoor Survival : 13 Winter Camping Tips For Every Survivalist
image via duluthpack

Winter camping requires a lot of preparation for everyone who is planning to embark on this “cool” adventure. Having the right or appropriate gear and clothing alongside with mental and physical preparedness can lessen if not avoid any hassle that winter camping may bring.  In an event of a survival situation or when SHTF, how prepared and equipped we are will be one of the deciding factors of out fate.

2. Go to bed warm


Go to bed warm | Outdoor Survival : 13 Winter Camping Tips For Every Survivalist
image via Reuters

Even if we can get some good insulation from a sleeping bag or winter clothing it is useless bedding down if you’re already freezing. You need to do a little bit of jumpin’ jacks before hitting the sack or perform sit-ups or press-ups while you’re in your sleeping bag.

3. Eat for warmth and energy


Eat for warmth and energy | Outdoor Survival : 13 Winter Camping Tips For Every Survivalist
image via pitchup

If you want to have warmer nights, then your food should adopt to it. Physiologically, our body burns sugar to produce heat for itself and eating warm food can increase its sensation. As we devour hot porridge or a steaming bowl of chicken soup we become warm thus making us more comfortable.

4. Pack the snow


Pack the snow | Outdoor Survival : 13 Winter Camping Tips For Every Survivalist
image via csdailyblog

Pack down your campsite before you set up your tent. Your body heat can melt the loose snow thus leaving you with uneven flooring to lay or sleep upon. You should also position your tent away from the danger of an avalanche or falling trees.

5. Stay dry


Stay dry | Outdoor Survival : 13 Winter Camping Tips For Every Survivalist
image via quatrenatures

Whenever you’re winter camping, you need to stay dry at all cost. You will feel the biting cold especially when your layers get wet. Bringing extra clothing will always be advantageous and will shield you from the harshness of the cold. Staying dry also extends to your gears. Protect your equipment with a waterproof layer or place it inside your tent or shelter.

6. Start fall and winter trips early in the morning


Start fall and winter trips early in the morning | Outdoor Survival : 13 Winter Camping Tips For Every Survivalist
image via natureflip

You must always remember that the sun goes down early during the winter season. So starting your trip early in the morning is always better that starting it in later in the day. It will be best to set up your tent or find the perfect camping site before it gets dark.

7. Snow is a variable matter and only rarely is one situation is like the next


Snow is a variable matter and only rarely is one situation is like the next | Outdoor Survival : 13 Winter Camping Tips For Every Survivalist
image via hellobc

Before you set your tent, you need to pick a flat spot with a lot of trees around it. This will act as a natural windbreaker. Since snow is a variable matter, you need to be aware where you are setting up your tent. Anchor your tent safely and securely.

8. Keep your matches in a metal, not plastic, container


Keep your matches in a metal, not plastic, container | Outdoor Survival : 13 Winter Camping Tips For Every Survivalist
image via trend hunter

We all know the importance of fire in our daily lives. It helps us cook food and stay warm. So whenever you’re camping in the winter season, it is advisable to keep your matches in a metal container instead of a plastic one because it easily breaks when it gets frozen.

9. Put boiling water in your water bottle and sleep with it at your feet


Put boiling water in your water bottle and sleep with it at your feet | Outdoor Survival : 13 Winter Camping Tips For Every Survivalist
image via offbeathome

If you want to have a non-frozen water that you can easily drink in the morning then you have to fill your water container with boiling water. Put it inside a sock and keep it inside your sleeping bag to provide extra warmth.

10. Don’t go alone


Don’t go alone | Outdoor Survival : 13 Winter Camping Tips For Every Survivalist
image via JoeRobinetBushcraft

I know that there are times that you want to go camping alone and away from any distractions. But it is always best and safe if you have someone to accompany you. So in the event of an emergency situation, help is just around. And always leave a message or a detailed trip plan at home so that your loved ones will be informed of your whereabouts.

11. Improve zipper pulls


Improve zipper pulls | Outdoor Survival : 13 Winter Camping Tips For Every Survivalist
image via chicagorockandiceguides

Zippers are important to winter clothes. They let you put on clothing quickly which is essential especially to those people who are exposed to extreme conditions. Most zippers that are included in jackets are not made for thick mittens or gloves. So you have to use a little ingenuity and improvise it by adding a 3-inch lanyard. 

12. Regulate your temperature on your hike


Regulate your temperature on your hike | Outdoor Survival : 13 Winter Camping Tips For Every Survivalist
image via polarbearsinternational

Regulating your temperature is necessary for a winter hike. You don’t have to get sweaty or chilled. You need to be aware or anticipate the weather that is coming your way. You have to act upon it before you even experience it. For example, it is better to put on additional layers before reaching the summit or a spot where the temperature is much lower.

13. Don’t cook in the tent


Don’t cook in the tent | Outdoor Survival : 13 Winter Camping Tips For Every Survivalist
image via cse

Cooking inside the tent is a recipe for destruction. Not only it can burn your tent but also it can lead to carbon monoxide poisoning. You can always choose a spot outside your tent where you can set up a waterproof tarp. If the weather is intolerable, at the very least you can cook inside the vestibule but with sufficient ventilation.  
The unprepared will have to deal with the cold realities that winter camping might bring. To greatly enjoy the beauty and peacefulness of winter camping you have to be prepared and the preparation for this kind of trip needs undivided consciousness. Having the proper gear and arming yourselves with knowledge about camping in extreme weather conditions will make your wilderness exploration an adventure to remember. Penny for your thoughts? Tell us what you think about this winter camping tips by dropping your two cents in the comments below.


Horse Keeping - Mud Management 102: Paddock Footing

Mud = yuck! At this time of the year mud becomes a common occurrence in many horse paddocks until summer when things dry out. If mud is an issue on your horse property you may be under the impression that it is an unavoidable part of having horses. But it doesn’t have to be! There are simple changes you can make to reduce or even eliminate mud on your property.

Before footing addition
In a previous post, Mud Management 101, I talked about gutters and downspouts as your first line of attack in reducing mud – keeping clean rainwater clean and not allowing it to mix with manure and dirt in the confinement areas. The next step for getting a handle on mud issues is to use some sort of footing in paddocks and other high traffic areas such as watering points and gates. The purpose for the footing is to build up the area to keep horses up out of dirt and allow rainwater to drain through. Less mud equals less chance of nutrients and sediments running off and polluting surface waters, too. Footings, such as hogfuel (chipped or shredded wood products), gravel (crushed rock) or coarse sand can go a long way in reducing mud. Gravel and coarse washed sand are probably the most useful and most available.
Gravel (crushed rock, no larger than ¾”—anything larger will be uncomfortable for horses to stand on) is a good footing to consider. It won’t break down like wood products do so you don’t have to replace in yearly, plus it drains well. You can get it with the fines (often called the “minus”) which will help it bind together and lock in place. Coarse washed sand also works well. It drains better and is less dusty than finer varieties. Be careful to avoid feeding horses on any type of sand as ingesting sand or dirt particles with hay can result in sand colic, a serious digestive disorder.
Use at least three inches of footing but more is better when it comes to footing. If you already have a lot of mud you may want to either remove some of the existing mud or plan to put footing in at least a 1:1 ratio (for example, if you have about six inches of mud each year you’ll need at least six inches of footing.)

After gravel footing
If your soil is especially mucky or clay-like, you may want to consider first laying down some type of geotextile filter fabric and then placing the footing on top. Geotextile fabric, purchased through garden supply and hardware stores, helps keep the soil layer from working its way up into the footing. More on geotextiles in a future blog – stay tuned!
At our ranch the past couple of weeks we’ve been working on bringing in footing for several paddocks. We would have preferred 3/8 to 5/8” crushed rock but in our new location the smallest crushed rock size available seems to be ¾”.  We put this in our paddocks at about three inches deep. In our large, group paddock we only put it around the gate, feeders and stock watering tank, the high traffic areas. The biggest downside I see to this slightly larger size is it doesn’t fit through the tines of a manure fork, therefore we may end up pitching some our expensive gravel into the compost every time we clean.
At least paddocks will be easier to clean and the horses will be out of the mud. One more step at Sweet Pepper Ranch towards being eco-friendly (less muddy runoff!), chore efficiency and improved horse health.
post by Alayne RenĂ©e Blickle

HOW TO CLEAN YOUR FOOTWEAR

Best way to regularly clean your hiking and running shoes

If your footwear becomes damp and covered with mud, clean them immediately after use, do not leave them dirty to dry. Natural chemicals such as acids and alkalis which are found in different soils and dirt can work their way into the material and start to slowly decay and rot them thus weakening the overall strength of the

Ignoring cleaning breaks down your boots in a couple of ways:

Every time your boots flex, particles of dirt, grit or sand creep deeper into their leather and fabric, grinding away like sandpaper.

Mud sucks moisture from leather as it dries, leaving your boots’ leather less pliable and speeding up its aging process. This also prevents damage to any waterproof linings and membranes that may be inside.


The most effective way to clean your footwear is to immediately rinse them under clean tap water with a soft bristled brush. If possible, remove the insole inside the shoe and let them dry naturally. Do not under any circumstances put them in a clothes dryer, on top of a heater, near an open flame, or leave in direct hot sunlight.

Removing stains from hiking and running shoes

Generally a mild dishwashing detergent can remove most stains. For oil, grease, ink, sap or gum, 100% acetone or isopropyl alcohol will work best as a spot cleaner and can safely remove stains from many fabrics and leather that aren’t affected by soap or detergent.
To remove stubborn stains, moisten a cotton cloth with a few drops of 100% acetone or isopropyl alcohol. First test the alcohol on an inconspicuous part of the boot and allow it to dry. If there isn’t any discoloration, repeat and rub the stain, but do not saturate the fabric. Allow it to dry. Using a toothbrush or light bristled brush, clean the stain with a drop of dishwashing detergent and scrub until the stain disappears. Rinse the boot in warm water and damp dry with a clean towel. Fully let dry naturally!

Reapplying waterproof finishes on hiking boots and shoes

Most waterproof  breathable materials are treated with a water repellent finish, which keeps the outer material from becoming saturated with water so the breathable barrier can do its job. This coating needs to be reapplied every so often. A simple water drop test can be performed to see if the boot should be re-coated. If water no longer beads up on the outside of the boot, it’s time for another surface treatment. There are several spray products on the market that can restore water repellency. Whichever you choose, be sure to follow the manufacturer’s instructions. Before these treatments can be applied and effectively work, the footwear should be clean and dry.